howto

Adding authentation with clerk

make it simple

tags
auth
nextjs
clerk
vercel

Clerk is a way to add authentication to your site that can be done in under 10 minutes. This is table stakes and why reimplement the wheel?

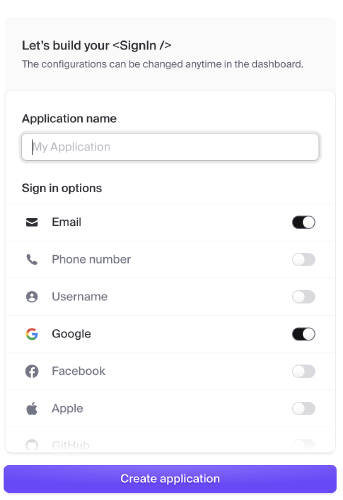
Create the clerk app

Go to clerk.com and signup.

Add you app name and select the login providers. Keep this window open.

Create the nextjs app

1
  npx create-next-app@latest

Answer the questions and then go into the directory, and install @clerk/nextjs:

1
  npm install @clerk/nextjs

Add middleware.ts

We set up the middleware which is used to protect the routes that we want. In this case, it'll be /dashboard.

 1
 2
 3
 4
 5
 6
 7
 8
 9
10
11
12
13
14
15
16
17
18
19
20
21
22
  // src/middleware.ts
  import {
    clerkMiddleware,
    createRouteMatcher
  } from '@clerk/nextjs/server';

  const isProtectedRoute = createRouteMatcher([
    '/dashboard(.*)',
  ]);

  export default clerkMiddleware((auth, req) => {
    if (isProtectedRoute(req)) auth().protect();
  });

  export const config = {
    matcher: [
      // Skip Next.js internals and all static files, unless found in search params
      '/((?!_next|[^?]*\\.(?:html?|css|js(?!on)|jpe?g|webp|png|gif|svg|ttf|woff2?|ico|csv|docx?|xlsx?|zip|webmanifest)).*)',
      // Always run for API routes
      '/(api|trpc)(.*)',
    ],
  };

Update the layout.tsx

  1. Surround everything with ClerkProvider
  2. Create a header that has the SignedOut, SignInButton, SignedIn, and UserButton.

SignedOut and SignedIn will render their children when the user is either signed out or in.

SignInButton will trigger the login flow.

And UserButton will show the dropdown with the user avatar that lets the person manage their account.

 1
 2
 3
 4
 5
 6
 7
 8
 9
10
11
12
13
14
15
16
17
18
19
20
21
22
23
24
25
26
27
28
29
30
31
32
33
34
35
36
  // src/app/layout.tsx

  import {
    ClerkProvider,
    SignInButton,
    SignedIn,
    SignedOut,
    UserButton
  } from '@clerk/nextjs'
  import './globals.css'
  export default function RootLayout({
    children,
  }: {
    children: React.ReactNode
  }) {
    return (
      <ClerkProvider>
        <html lang="en">
          <body>
            <header className="px-4 py-2 flex items-center justify-between">
              <h1>Logo</h1>
              <SignedOut>
                <SignInButton>
                  <button className="px-4 py-2 text-white bg-blue-500 rounded-md">Signin</button>
                </SignInButton>
              </SignedOut>
              <SignedIn>
                <UserButton />
              </SignedIn>
            </header>
            {children}
          </body>
        </html>
      </ClerkProvider>
    )
  }

Homepage

In the main page, we can show off a few things.

  • Showing the Signout button if the user is signed in
  • Showing the Signin button otherwise
  • Linking to the dashboard page
 1
 2
 3
 4
 5
 6
 7
 8
 9
10
11
12
13
14
15
16
17
18
19
20
21
22
23
24
25
26
27
28
29
30
31
32
33
34
35
  // src/app/page.tsx
  import {
    SignedIn,
    SignedOut,
    SignInButton,
    SignOutButton,
  } from '@clerk/nextjs';
  import Link from 'next/link';

  export default function Home() {
    return (
      <main className='flex min-h-screen flex-col items-center justify-between p-24'>
        <h1 className='text-4xl font-bold text-center'>How are you?</h1>

        <div className='flex w-64 items-center justify-between'>
          <SignedIn>
            <SignOutButton>
              <button className='px-4 py-2 text-white bg-gray-500 rounded-md'>
                Signout
              </button>
            </SignOutButton>
          </SignedIn>
          <SignedOut>
            <SignInButton>
              <button className='px-4 py-2 text-white bg-blue-500 rounded-md'>
                Signin
              </button>
            </SignInButton>
          </SignedOut>

          <Link href='/dashboard'>Dashboard</Link>
        </div>
      </main>
    );
  }

Client Side Access

To get access to the user on the client side, make sure that you have the 'use client' directive on the front of you page and access the user and session information with useUser and useSession.

 1
 2
 3
 4
 5
 6
 7
 8
 9
10
11
12
13
14
15
16
17
18
19
20
21
22
23
24
25
26
27
28
29
30
31
32
33
34
35
36
37
38
39
40
41
42
43
44
45
46
47
48
49
50
51
52
53
54
55
56
57
58
59
60
61
62
63
64
65
66
67
68
69
70
71
72
73
74
75
76
77
78
79
80
81
82
83
84
85
86
87
88
89
90
91
92
  // src/app/dashboard/page.tsx
  'use client';

  import { useSession, useUser } from '@clerk/nextjs';

  function formatDateWithNumbers(date: Date): string {
    return date.toLocaleString('en-US', {
      month: 'numeric',
      day: 'numeric',
      year: 'numeric',
      hour: 'numeric',
      minute: '2-digit',
      second: '2-digit',
      hour12: true,
    });
  }

  function UserPanel() {
    const { user } = useUser();
    const { session } = useSession();

    if (!user) {
      return <h1>No user object</h1>;
    }

    return (
      <table>
        <thead>
          <tr>
            <th className='pr-2 text-left'>Key</th>
            <th className='pr-2 text-left'>Desc</th>
            <th className='pr-2 text-left'>Value</th>
          </tr>
        </thead>
        <tbody>
          <tr>
            <td>Avatar</td>
            <td className='text-left text-gray-500 pr-2'>user.imageUrl</td>
            <td>
              <img src={user.imageUrl} className='size-20 rounded-full' />
            </td>
          </tr>
          <tr>
            <td>Email</td>
            <td className='text-left text-gray-500 pr-2'>
              user.emailAddress[0].emailAddress
            </td>
            <td>{user.emailAddresses[0].emailAddress}</td>
          </tr>
          <tr>
            <td>Name</td>
            <td className='text-left text-gray-500 pr-2'>
              user.firstName && user.lastName
            </td>
            <td>
              {user.firstName} {user.lastName}
            </td>
          </tr>
          <tr>
            <td>Created</td>
            <td className='text-left text-gray-500 pr-2'>user.createdAt</td>
            <td>{formatDateWithNumbers(user.createdAt)}</td>
          </tr>
          <tr>
            <td>Last Signin</td>
            <td className='text-left text-gray-500 pr-2'>user.lastSignInAt</td>
            <td>{formatDateWithNumbers(user.lastSignInAt)}</td>
          </tr>
          <tr>
            <td>Last Active</td>
            <td className='text-left text-gray-500 pr-2'>session.lastActiveAt</td>
            <td>{formatDateWithNumbers(session.lastActiveAt)}</td>
          </tr>
          <tr>
            <td>Session Expires</td>
            <td className='text-left text-gray-500 pr-2'>session.expireAt</td>
            <td>{formatDateWithNumbers(session.expireAt)}</td>
          </tr>
        </tbody>
      </table>
    );
  }

  export default function Page() {
    return (
      <main className='flex min-h-screen flex-col items-center justify-between p-24'>
        <div className='overflow-hidden px-4 py-2 rounded-lg bg-white shadow'>
          <UserPanel />
        </div>
      </main>
    );
  }

API/Server access

Lets see how we can get access to the user with the api:

 1
 2
 3
 4
 5
 6
 7
 8
 9
10
11
12
13
14
15
16
17
18
19
  // src/app/api/route.ts
  import { auth, currentUser } from '@clerk/nextjs/server';

  export async function GET() {
    const data = { hello: 'world' };

    const user = await currentUser();

    if (user) {
      data.name = `${user.firstName} ${user.lastName}`;
      data.email = user.emailAddresses[0].emailAddress;
      data.imageUrl = user.imageUrl;
    }

    console.log('auth', auth());
    console.log('currentUser', await currentUser());

    return Response.json(data);
  }

Now if you hit http://localhost:3000/api from the browser and you are logged in, you should see your user information in the request.

Deploying to Vercel

Now that we have this working, lets try and get it deployed onto the web using Vercel.

First make sure that you've pushed your code to github.

Then create a new vercel app from that repo.

Then copy and paste in your .env.local file into the environment.

And press deploy.

And it just works!

You'll probably want to add a domain on both the vercel and clerk side of things but this is enough to get going.

Previously

labnotes

Sending email with react-email

its nicer to use their interative builder but why not just the simple thing

tags
react
email
htmlq
reactemail

Next

howto

Adding react-email to a nextjs app

tags
nextjs
react-email
resend
vercel
email